Sea Salt Chocolate Chip Cookies

l think when you really love to bake, you start becoming fixated on one particular aspect of it. Bread bakers are always striving for the perfect loaf. Cake makers are always looking for the perfect crumb and cake to frosting ratio. In my case, I’m constantly in search of the perfect chocolate chip cookie. This weekend, I set out to find it.

I’ve tried some really, really good chocolate chip cookies in my time, and I take notes as I eat them. I like the consistency to be soft but not too soft, the edges to be slightly crispy, and the chocolate to be gooey, melted, and luxurious. Through these observations, and through experimentation in my own kitchen, I’m moving one step closer to creating the best chocolate chip cookie recipe ever.

That’s where these sea salt chocolate chip cookies come in. I created a recipe this weekend that combined everything I knew about baking chocolate chip cookies with notes from ones I’ve tasted. I bought the best chocolate I could find, Valrhona, which was a splurge but totally worth it. You can taste the difference between cheap chocolate and the good, expensive kind. It’s like having a good glass of wine. You might settle for the cheap stuff sometimes, but you’ll never really enjoy it as much as when you get the quality bottle.

Also, I used flaky Maldon sea salt on top. I’ve done this before with chocolate chip cookies, but this time, I didn’t hold back. I’m a strong believer that salt makes a huge difference in chocolate chip cookies. It balances all the sweetness, and it adds more flavor to the cookies. I added a little pile on top of each cookie before it went into the oven.

Finally, I chilled the dough overnight. I sometimes skip this step, because honestly, who wants to wait a day for chocolate chip cookies? Also, I had a chef tell me once this step is completely useless. However, the more I bake chocolate chip cookies, the more I realize it’s really necessary for the best possible final product. I’m not a food scientist, so I’m not sure why chilling the dough helps. If I had to guess, it would probably be because it gives the dough a chance to meld together more and for the ingredients to settle before you put it in the piping hot oven. Either way, I’d recommend doing it because you’ll end up with a cookie with a near perfect consistency- soft, chewy, melty, and decadent.

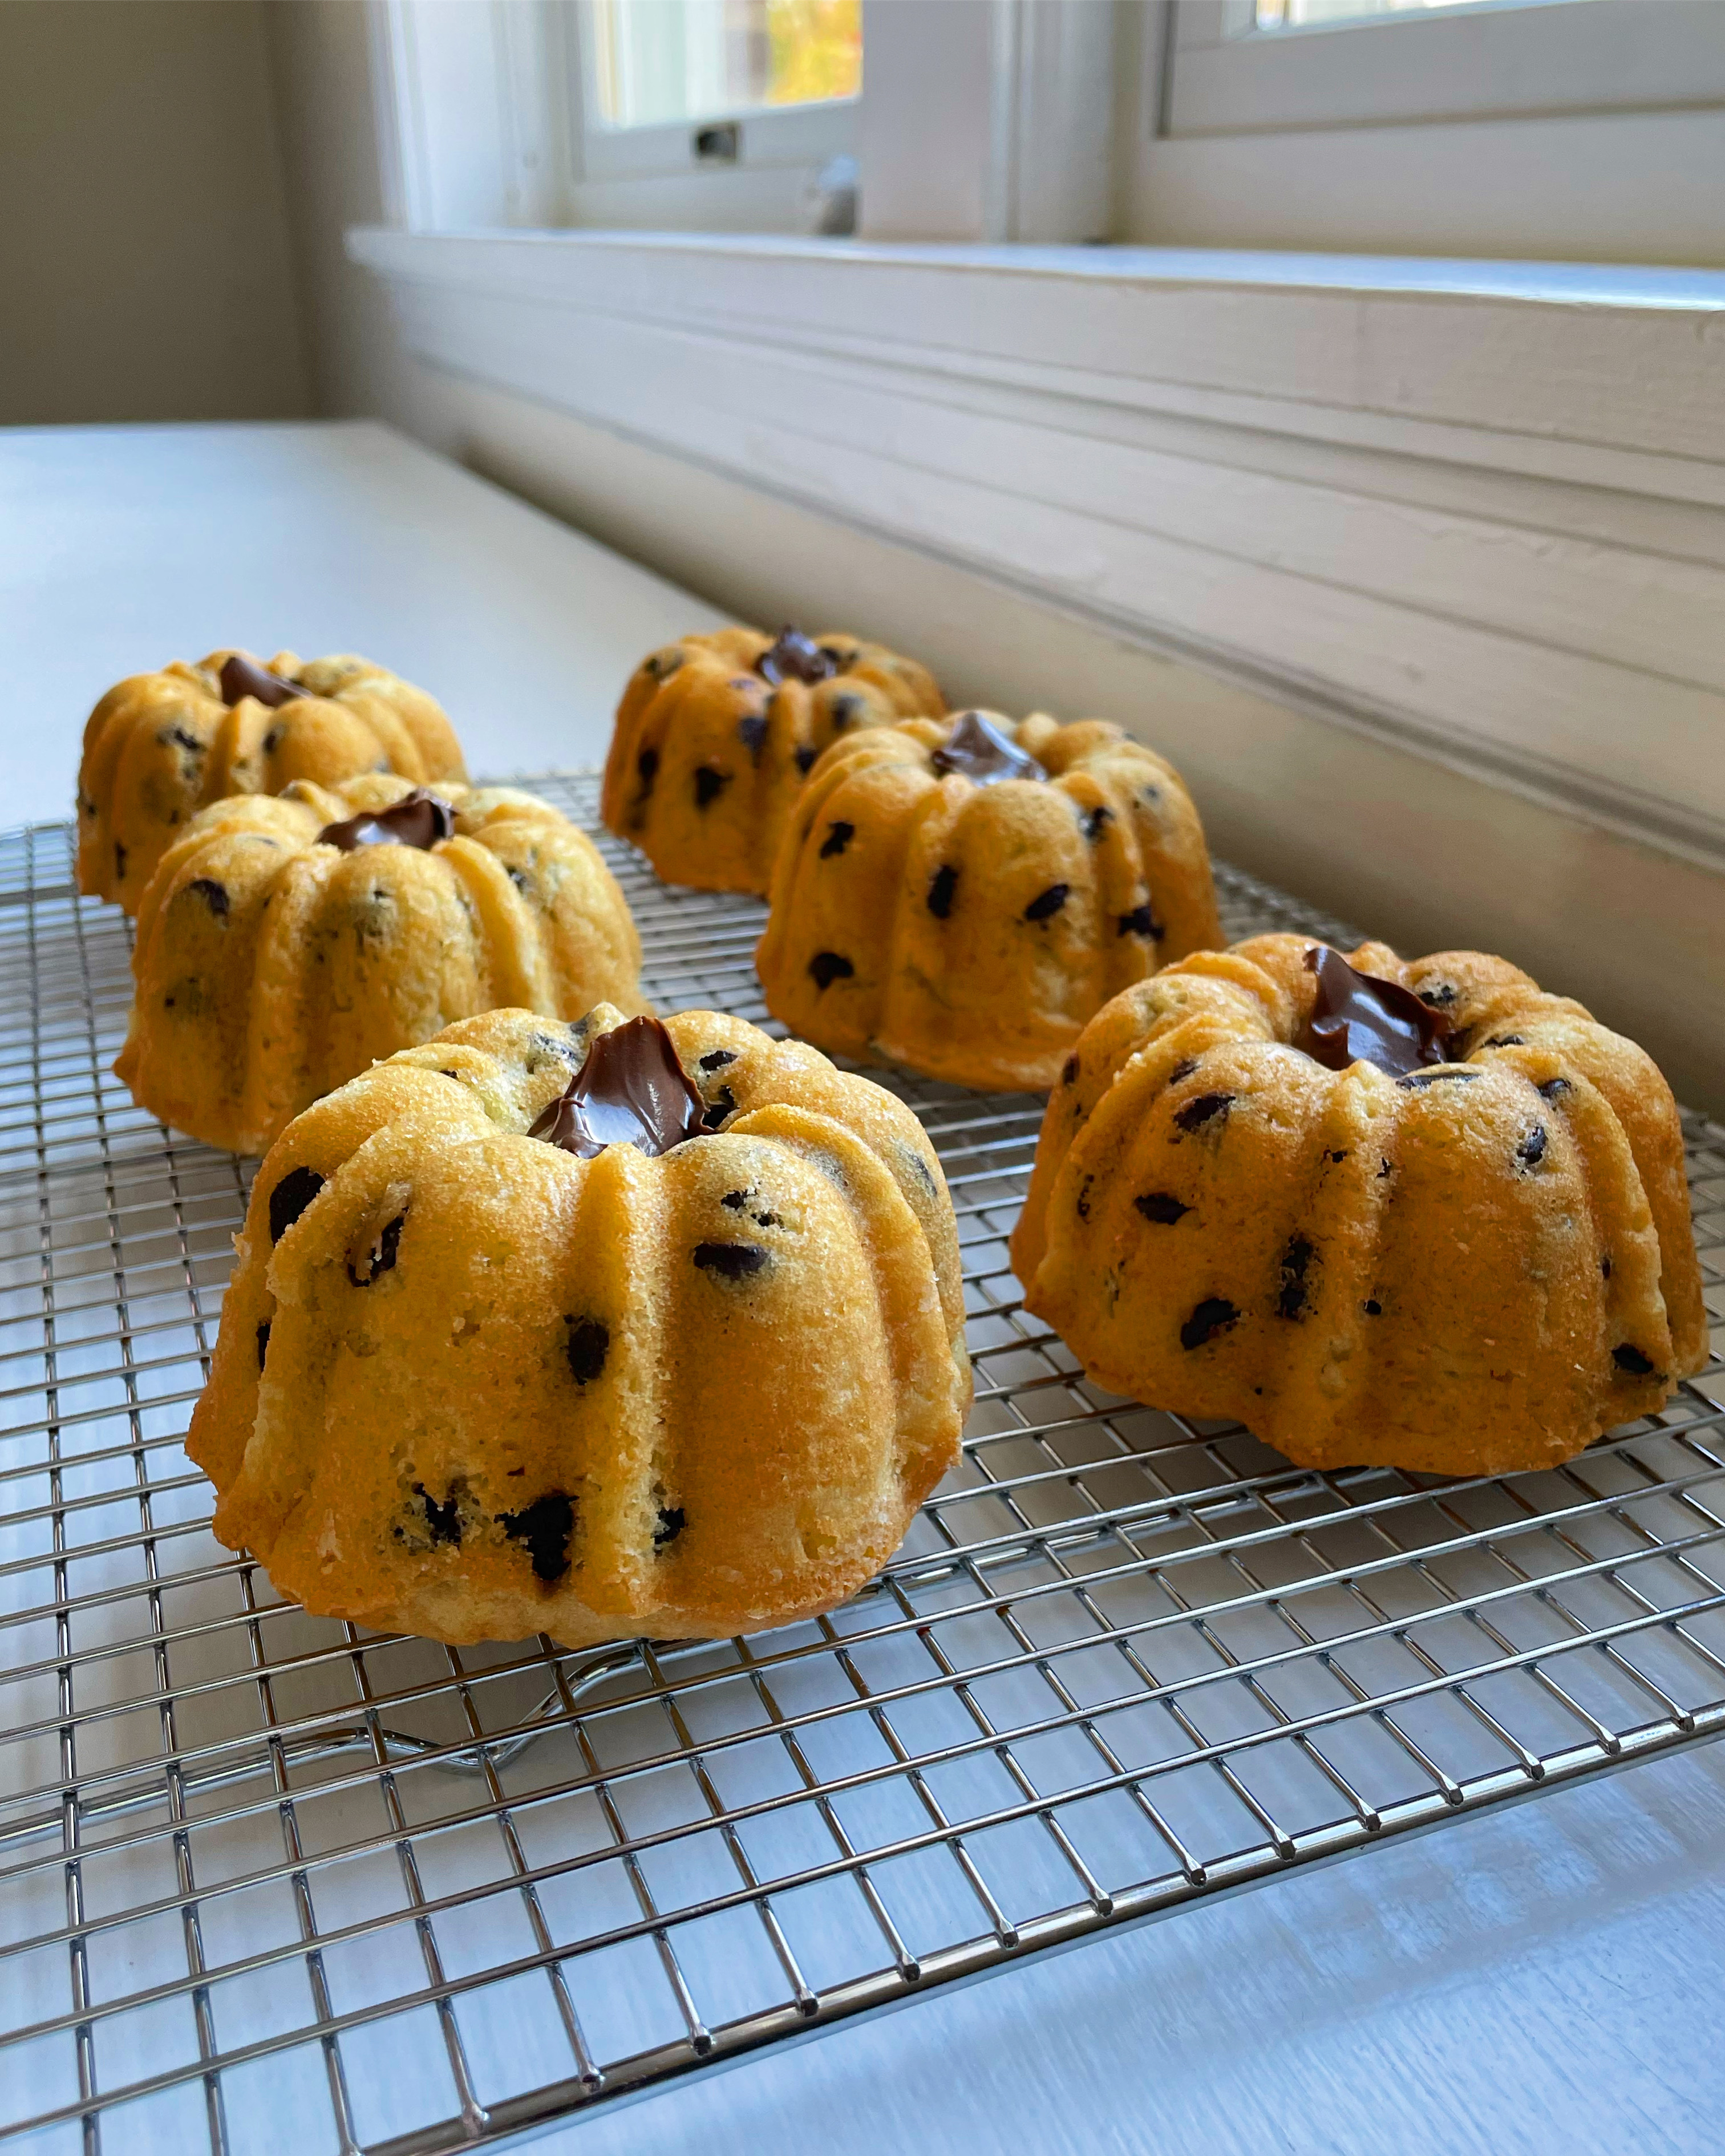
One more thing I did that makes a difference is reserving some of the chopped chocolate for the tops of the cookies before they chill in the fridge. If you’ve ever wondered how fancy chocolate chip cookies get those decadent pools of chocolate on top, this is how. You can wedge the chocolate in the balls of cookie dough before you put them in the fridge to chill overnight. Then, they will melt down and sink into the cookies as they bake in the oven.

I’m going to keep playing around with ratios and ingredients this year, but this recipe is the closest I’ve gotten to finding the best chocolate chip cookie. I’ll keep you posted on my progress.

Here’s a song to get you started on your next chocolate chip cookie baking project.

Sea Salt Chocolate Chip Cookies

Ingredients

226 g unsalted butter (2 sticks), room temperature
100 g dark brown sugar
200 g light brown sugar
100 g granulated sugar
1 tsp vanilla extract
1 egg, room temperature
1 egg yolk, room temperature
196 g all-purpose flour
200 g bread flour
1 tsp baking soda
pinch of Kosher salt
4 oz good quality dark chocolate, chopped
flaky sea salt for topping

Directions

Combine the butter, sugars, and vanilla extract in the bowl of a stand mixer using a paddle attachment. Mix together until it’s light and fluffy. Add the egg and mix on low until combined, then add the egg yolk and mix until combined. Use a spatula to scrape down the sides as needed.

In a medium bowl, whisk together the flours, baking soda, and pinch of salt. Add to the bowl of the stand mixer and mix on low until just combined. Add most of the chopped chocolate and continue to mix until incorporated. I like to use the spatula at this point to scrape the bottom and the sides, and make sure everything is evenly incorporated.

Use a cookie scoop to scoop balls of dough onto a baking sheet lined with parchment paper. Top each dough ball with a little reserved chocolate, pressing it gently into the surface so it adheres to the cookie. Wrap the baking sheet in plastic wrap and place it in the fridge for at least eight hours or overnight.

When you’re ready to bake the cookies, preheat the oven to 338 degrees F. Line a new baking sheet with parchment paper. Place some of the dough balls on the sheet, leaving 2 inches between each of them, and sprinkle a healthy amount of flaky sea salt on top of each ball. Bake for about 15 minutes, or until the cookies are mostly set and starting to brown on top. Remove the oven and let the cookies cool on the sheet for a few minutes before carefully placing them on a wire rack to cool completely. Repeat the baking process until all your cookies are done. Enjoy!

Posted in Cookies, Dessert | Tagged , , , , , , , , , , , , , , | Leave a comment

Lemon Ricotta Cake

We’ve been having some *very* cold days in St. Louis. I’m a wimp when it comes to cold, so I complain any time it drops below 32 degrees. However, it has dropped below zero multiple times this month. When I went outside last week and yesterday, I experienced a feeling I hadn’t since my days living in Chicago: Bone-chilling cold- the kind that gets under every layer of clothing and your skin, and immediately makes you want to run inside and never come out.

Luckily, I had this lemon ricotta cake on the docket to make this weekend. It is the perfect antidote to freezing your…well, you know…off, and it does provide some brightness and cheer on gloomy winter days. It is light and bright with the perfect crumb. When I say perfect, I mean perfect; it is moist and slightly dense, but not too dense, which means you can comfortably have a couple slices with a cup of tea and coffee and not feeling bogged down afterward. It also smells like a glazed doughnut as it’s baking. I’m not sure how it accomplishes that…but I’m not asking too many questions.

The key to making this cake the best it can be is using whole milk ricotta. Do not, I repeat, DO NOT, use part-skim. This will result in a way different crumb, and an overall less moist and dense cake. I’m the type of person who sometimes makes substitutions in a recipe. For example, I’ll use 2% milk instead of whole, or when I’m cooking, I’ll use whole milk instead of cream in soup. But the more I bake, the more I realize that whole-milk or cream is essential in recipes that call for it. It’s there for a reason; it tenderizes the crumb to make it the best it can be.

This cake is so easy to make, and so delicious, I know I’ll be making it for years to come. I can see it having a starring role on a holiday breakfast or brunch table, or just another Sunday winter morning when I need something delicious and refreshing to perk me up. In the meantime, I’m going to cut another slice and have it with some Earl grey tea. I’d highly recommend that paring.

Here’s a song to get you started on your lemon ricotta cake journey.

Lemon Ricotta Cake

Ingredients

2 large lemons, juiced and zested
3/4 cup granulated sugar
2/3 cup olive oil
1 cup whole milk ricotta
3 eggs
2 tsp vanilla extract
1 1/4 cups all-purpose flour
2 tsp baking powder
pinch of Kosher salt
powdered sugar for dusting

Directions

Preheat the oven to 350 degrees F with a rack set in the middle. Spray an 8-inch or 9-inch cake pan with nonstick cooking spray, line the bottom and the sides with parchment paper, then slightly spray the paper with cooking spray.

Put the lemon zest and sugar in the bowl of a stand mixer and use your fingertips to rub the zest into the sugar until the mixture is fragrant. Add the olive oil, ricotta, lemon juice, eggs, and vanilla extract, and whisk until combined.

In a medium bowl, whisk the flour with the baking powder and salt. Add the dry ingredients to the wet and whisk until just combined. Use a spatula to make sure all the flour is incorporated, scraping the sides and the bottom of the bowl and gently combining everything.

Pour the batter into the prepared cake pan and bake for about 40 minutes, or until the top springs back to the touch, the cake is pulling away from the sides of the pan, and the top is golden brown. I started checking mine at 35 minutes. Depending on your oven, you may need to bake it for 45 minutes. Just keep checking until it is ready to come out.

Let it cool in the pan for 20 minutes, and then invert it onto a wire rack to cool completely. Once it is cool, dust the top with powdered sugar. Enjoy!

Posted in Brunch, Cake, Dessert | Tagged , , , , , , , , , , , , , , | 2 Comments

Gingerbread Doughnuts

One of my favorite things to bake at home are doughnuts. “Bake?” you might say. Yes, doughnuts are traditionally fried, but if you like soft, pillowy doughnuts and don’t like cleaning up grease or oil splatters, baked doughnuts are a great alternative. Plus, homemade fried doughnuts don’t taste as good as the ones you get at the store (in my humble opinion).

These gingerbread baked doughnuts are a lot like apple cider doughnuts you would eat in the fall, minus apple cider and with a lot of molasses and ginger (two key ingredients in gingerbread). They are sweet and full of warming spices. They are delicious alone, but they’re even better with a cup of coffee.

A key part of making baked doughnuts is getting a good doughnut pan, and then spraying it within an inch of its life. No one (including me) likes to take a pan of doughnuts out of the oven and proceed to spend an hour trying to dig them out with a butter knife. The trick to avoiding this is lots of cooking spray, which you should apply liberally to the pans before you fill them with batter.

Also, I would highly recommend using a piping bag and tip to get the batter into the doughnut pan cavities. You can use a spoon or two, but it’s so much easier and less messy to use a piping bag. After you fill the piping bag with batter, point the tip toward the bottom of the cavity with one hand and use the other to squeeze the batter into the pan until the cavity is almost full. Make a circle with the hand that is pointing the bag (essentially tracing the circle of the doughnut cavity).

After the doughnuts come out of the oven, let them cool a little in the pan before removing them and letting them cool more until you can handle them with your bare hands. Then, quickly dip each side in a bowl of melted butter and again in the bowl with a cinnamon, ginger, sugar mixture.

The doughnuts taste best the day they’re made (ideally right after you dip them in butter and sugar), but they’ll also taste good the next day if you store them in an airtight container.

Here’s a song to get you started on your gingerbread doughnuts.

Gingerbread Doughnuts

Ingredients

for the doughnuts:
1 1/4 cup (156 g) all-purpose flour
1 tsp ground cinnamon
3/4 tsp ground ginger
pinch ground cloves
pinch ground allspice
1/2 tsp baking powder
1/4 tsp baking soda
1/4 tsp salt
2 Tbsp unsalted butter, melted
1/4 cup (50 g) packed dark brown sugar
1/4 cup molasses
1 large egg
1/2 cup (120 ml) whole milk
3 Tbsp whole milk Greek yogurt

for the topping:
1/4 stick unsalted butter, melted
1/3 cup granulated sugar
1/2 tsp ground cinnamon
1/2 tsp ground ginger

Recipe

Preheat the oven to 350 degrees F. Liberally spray two 6-cavity doughnut pans and set aside.

Whisk together the flour, ground spices, baking powder, baking soda, and salt in a medium bowl. In the bowl of a stand mixer, whisk together the melted butter, brown sugar, and molasses until combined (about one minute). Whisk in the egg until combined, then whisk in the whole milk and Greek yogurt until the liquid ingredients are thoroughly combined. Use a spatula if you need to to scrape down the sides and the bottom of the bowl to make sure everything is incorporated.

Use a spatula to mix the dry ingredients into the wet ingredients, mixing only until just combined and you can’t see any traces of flour. Do not overmix. Use a piping bag or spoons to fill the prepared doughnuts pans with batter. Tap each pan lightly on the counter to make sure the batter is evenly distributed.

Bake the doughnuts for about 13 minutes, or until the tops lightly spring back to the touch. Remove the pans from the oven and allow the doughnuts to cool slightly before removing them to cool further on a wire wrack.

In the meantime, melt the butter for the topping in a small saucepan on medium low heat, and then pour it into a shallow bowl to cool slightly. Whisk together the sugar with the ground cinnamon and ginger. When the doughnuts are still warm but cool enough to handle, dip each side in the melted butter and then repeat the process in the sugar-spice mixture. Repeat until you’ve coated all the doughnuts. Enjoy!

Posted in Breakfast, Brunch | Tagged , , , , , , , , , , , , | Leave a comment

Chocolate Chip Mini Bundt Cakes (Les tigrés)

After my grandmother passed away a couple years ago, I went to her house to see if there was anything I wanted to keep. I grew up going to that house almost every week, and still, some of the things I found there were a complete mystery to me. See: a cast-iron mini bundt pan. My grandmother did not like to bake, and I can’t remember her ever taking out a bundt pan and making cakes. The pan was in perfect condition and looked like it had never been used, which added to my hypothesis that she had probably never touched it. I guess it was destined for me. I took it home and didn’t use it for a year.

Then, I found a recipe for something called “Les tigrés.” In France, there are little cakes made in molds called “volcans,” or volcanoes, which are essentially the equivalent of bundt cake molds. The cakes are sweet, soft, and light because they’re made out of a combination of almond powder, flour, and powdered sugar. You make variations of this cake, but if you want to make “les tigrés,” you should use chocolate chips. As you might have guessed, “tigré” means “tiger” in French, and these cakes are named for how a tiger looks (orange-yellow base with black markings throughout).

You can probably make these cakes with ingredients you already have on hand, but the one thing you might have to look for at a specialty store or online is “amandes en poudre,” or almond powder. I found a bag of it on Amazon. The powder is part of what gives the cakes their nutty flavor and moistness. For reference, I used a whole bag for this recipe, so it’s not like you’ll order some, use a little, and then have it sitting in the pantry forever until you remember to make bundt cakes again.

A finishing touch on these cakes is Nocciolata, or Italian chocolate hazelnut spread. You don’t need to add it, but I would highly recommend putting a small dollop in the middle of each cake for some extra sweetness. You can easily find Nocciolata at Whole Foods. If you have Nutella at home, that will work well, too.

Here is a song to get you started on your mini bundt cake journey.

Chocolate Chip Mini Bundt Cakes (Les tigrés)

Ingredients:
160g salted butter
100g poudre d’amande (almond powder)
200g powdered sugar
110g all-purpose flour
4g baking powder
egg whites from 10 eggs, at room temperature
1 bag of dark chocolate chips (I used Guittard)
Nocciolata

Recipe:

Grease and flour a mini bundt cake pan and set aside. Preheat the oven to 347 degrees F.

Melt the butter in a small saucepan over medium-low heat. Let it brown, then remove it from the heat and pour it in a bowl to cool.

Whisk the almond powder, powdered sugar, and baking powder in the bowl of a stand mixer until combined. When the butter is cool, add it and the eggs to the dry ingredients and whisk until combined. Mix in the dark chocolate chips. Give the batter a few turns with a spatula, scraping the sides and bottom of the bowl to make sure nothing is sticking.

Fill the prepared bundt cake pan with the batter so each mold is full. Place it in the oven to bake for about 20 minutes, or until the cakes look light brown on top and spring back slightly to the touch. Keep an eye on things; they might bake faster in a different oven. I would check around 15 minutes and go from there.

When the cakes are done baking, remove the pan from the oven and allow it to cool slightly for a few minutes. Use a butter knife to carefully release any parts of the cakes from the pan that look stuck. Then, invert the pan and tap it lightly to release the cakes onto a counter or wire rack. Turn the cakes right-side up and allow them to cool on a wire rack. When they are cool, add a small dollop of Nocciolata in the middle. Enjoy!

Posted in Breakfast, Cake | Tagged , , , , , , , , , , , , , , , | Leave a comment

Butternut Squash, Spinach, Gnocchi Skillet

Let’s face it: We could all use some comfort food right about now. I feel myself about to veer into dangerous territory venting my frustration with recent events, but luckily, I already did that a week ago. If you want to get my thoughts on some of what’s been going in the world recently, you can read my Medium piece.

If you want to talk food, read on. Perhaps unsurprisingly, I menu plan weeks in advance. I do it partly so I know what to buy at the store and time things to be economical, but I also do it because there are so many recipes I want to make, I need to give them each a day to make sure I’m checking things off my (very long) list. I had decided to make this butternut squash, spinach, gnocchi skillet a while ago, back when I thought the beginning of November would be brisk, and I’d want some comfort food to warm me up.

Then, it was 85 degrees in St. Louis today. To me, that doesn’t really scream cream, cheese, and carbs, but I had all the ingredients, so I decided to forge ahead. I’m so happy I decided to make it.

This dish has a lot going for it: It comes together in one pan, making clean up easy later; it has a gratin and Mac and Cheese vibe going on, with the flavors of a French comfort food dish and the reassuring feeling of an American classic; and it has a crunchy top with breadcrumbs and toasted cheese. It is basically a hug in a skillet. I highly encourage you to go in for the hug.

This gnocchi skillet is the perfect canvas for experimentation. If you don’t like spinach, feel free to swap in kale or another leafy green. If you don’t like butternut squash…we probably shouldn’t be associated, but I’ll try not to be judgmental. You can add in roasted sweet potatoes instead.

The three things you shouldn’t skimp on are mascarpone, breadcrumbs, and cheese. I really like mascarpone in this dish because it’s a bit lighter than sour cream, and it adds a depth of flavor missing in heavy cream. You might be tempted to leave the breadcrumbs and cheese off the top and skip the broiling step at the end, but please, do not: The crispy top is part of what makes it so delicious.

Here’s a song to get you started on the recipe. If this dish is the food equivalent of a hug, this song is the music equivalent.

Butternut Squash, Spinach, Gnocchi Skillet

Ingredients

1 small to medium butternut squash, cubed (about 2 cups)
1 Tbsp olive oil, plus more for pan
3 garlic cloves, crushed
1 cup baby spinach
8 oz mascarpone
ground nutmeg
1/4 cup grated Parmesan cheese
17 oz shelf stable gnocchi
3 Tbsp breadcrumbs

Recipe

Heat your oven to 400 degrees F. Toss the cubed butternut squash with a drizzle of olive oil and a little salt, and spread it out on a sheet pan lined with a silicone mat or parchment paper. Roast it in the oven for about 25 minutes, or until it’s softened but not too brown. Remove from the oven, let it cool slightly, then mash up about half of the squash cubes with a fork. Set the mashed squash aside.

Put a couple teaspoons of olive oil in an oven-safe skillet and heat it on the stove over medium heat. Add three crushed garlic cloves and saute for 30 seconds, or until the garlic is sizzling but not brown. Add the baby spinach all at once and toss it around until it wilts. Add the mascarpone, a generous pinch of ground nutmeg, the mashed squash, and 2/3 cup of water. Stir the mixture until it becomes smooth and creamy. Stir in half the Parmesan. Add in the gnocchi and squash cubes and gently toss to combine. Allow the mixture to simmer for about 10 minutes, or until the gnocchi is softened. Add a little more water if the mixture is becoming too thick.

Preheat your oven to the high broil setting. Sprinkle the remaining Parmesan and the breadcrumbs on top of the gnocchi mixture, then put the skillet in the oven to broil for a few minutes. Keep a close eye on it, as the top will cook quickly. Remove the skillet from the oven when the top is nicely browned and the gnocchi mixture is bubbling. Enjoy!

Posted in Dinner, Uncategorized | Tagged , , , , , , | 2 Comments

Coconut Shrimp

I know it seems like all I do is bake, but sometimes, I actually cook. In fact, I probably cook more than I bake, but it’s usually not as pretty or post-worthy as what I bake, so I don’t really talk about it.

However, I have to tell you about these coconut shrimp. I’ve been on a kick lately where I dip things into egg and flour batter and fry them. Mostly, this pays off; as we all know, frying things makes them extra delicious. This coconut shrimp is no exception. They are tender on the inside and crispy and flaky on the outside. There’s definitely a tropical vibe happening with these, which is great in the middle of winter in the Midwest.

If you decide to make these, I would use the best shrimp you can find. Peel and devein them, leaving the tails on, and then dip them in egg and flour and coat them in shredded coconut. Fry them in oil until they’re golden brown on both sides. You’ll know when the shrimp is done by how brown the outsides are, but also by how the whole shrimp looks; they should curl up slightly in the pan before you remove them.

I like to serve these plain with some basmati rice and a simple green salad, but feel free to get creative. I’m sure hot sauce or some kind of citrus dressing for dipping would also taste great.

Here’s a song to get you started on your coconut shrimp journey. I love Tennis, and this is one of their latest songs. I really like the theme of taking a risk.

Coconut Shrimp

Ingredients

1/3 cup all-purpose flour
1/2 tsp salt
1/2 tsp ground black pepper
2 large eggs, beaten
3/4 cup Panko bread crumbs
1 cup unsweetened shredded coconut
1 pound raw large shrimp, peeled and deveined with tails attached
3–4 Tbsp vegetable oil

Directions

Select three medium bowls. In one bowl, whisk together the flour, salt, and pepper. In the second bowl, beat two eggs. In the third bowl, whisk together the Panko bread crumbs and coconut. Set the three bowls in a straight line side by side.

Going one shrimp at a time, dredge the shrimp through the flour, then the egg, and then toss it in the coconut breadcrumb mixture until it’s well coated. Set it on a plate. Repeat this process until you’ve gone through all the shrimp.

In a large skillet, heat the oil over medium heat. Working in batches, fry the shrimp until they’re golden brown, about two to three minutes per side. Remove the shrimp to a paper towel-lined plate. Repeat the process until you’ve fried all the shrimp. Serve them with rice and a green salad. Enjoy!

Posted in Dinner, Lunch | Tagged , , , , , , , , , , , , , | Leave a comment

Cinnamon Rolls

This holiday season was pretty much hell for me. It started with me dropping my car at the shop after a tire exploding and my bumper falling off. Then, I started feeling an internal sick tsunami; i.e., the feeling that I’m about to be very, very sick washing over me (it’s intuitive as much as it’s physical). Soon after, I tested positive for COVID and couldn’t get out of bed for a week. Every plan I had, including going out of town to see Jim’s mom and meeting my brother and his girlfriend in New York, went completely out the window.

I was really depressed about everything for about a week, but then I started looking for the silver lining. I think my body needed a break for a long time, and I kept overlooking it. I was so busy at work and at home from Thanksgiving on that I barely allowed myself time to just lie in bed and rest. The good news is, I got plenty of rest between December 19 and now, and I’m finally starting to feel better.

This morning, I slept late and then made cinnamon rolls from scratch. Some of you might be wondering how I could make cinnamon rolls in one morning. Most recipes call for them rising for several hours or overnight. The answer is, I used this brilliant recipe from Sally’s Baking blog (one of my go-to sources for basic pastry recipes). The recipe calls for instant yeast, not active dry, which makes the dough rise faster.

Sally also gives a tip for getting the rolls to rise quickly that is pure genius. You set your oven for 150 degrees (or in my case, 170 because that’s as low as it would go), and then once your rolls are formed into spirals, turn off the oven. Place the rolls in your prepped baking dish, put a piece of aluminum foil over the top, and then put the pan in the oven with the door cracked open for about 30 minutes. After that, close the door and leave them in the oven for another hour. The rolls will rise perfectly. Don’t forget to take them out before you preheat the oven to bake them.

The tip that Sally does not give but I would recommend is cutting your rolls with a very thin string. I’d read about this technique before but I was nervous to try it. However, after messing up cinnamon rolls and chocolate buns many times by cutting them with a knife, I was ready to try something new. It paid off. I cut off some unused fishing line from a roll that Jim keeps in the house. I used a knife to mark 11 places to cut to form the rolls. Then, I slid the inch-long string under the cinnamon roll log and used both sides to cut the log into pieces. It worked like a charm. If you want a good tutorial, King Arthur Baking has one. It calls for unflavored, unwaxed floss, not fishing line, but any thin string will do.

I hope you get to try these rolls soon! They do take a little work, but overall they come together way faster than overnight cinnamon rolls and taste even better. They’re soft, pillowy and sweet- the perfect thing to eat to start the new year. Here’s a song to get you started on your cinnamon roll journey.

Posted in Breakfast, Brunch | Tagged , , , , , , , , | Leave a comment

Chocolate Candied Orange Scones

It has been a while…like, four months a while. I have all the same excuses: New full-time job, new side gig (Amélie Bakery…more on that later), feeling under the weather multiple times and taking multiple COVID tests to rule it out.

But really, I haven’t written in a while because I’ve been wondering if keeping up this blog is worth it. Then, I was skimming the New York Times recently and I saw an article about the late Julie Powell. For those of you unfamiliar with Powell, she was the inspiration for the movie “Julie and Julia,” which was based on her story as a struggling admin in New York City who decided to start her own food blog about cooking every recipe from Julia Child’s famous cookbook, “Mastering the Art of French Cooking.”

Sadly, Powell recently passed away at age 49. The article chronicles her life, but it also touches on the evolution of the food blog since 2003, when Powell started hers and cooked (almost) all Julia Child’s recipes. Back in 2003, which was actually seven years before I started this blog, food blogging was relatively new. People weren’t really specialized or branded the way they are now (think, blogs devoted to sourdough bread baking, or ones devoted to one kind of cuisine). As Julia Moskin writes in the NYT article, “Powell didn’t start blogging because she was a prescient media observer; she wasn’t trying to capitalize on the audience for digital food content…What Powell did possess was an understanding that starting out as a cook is a universal experience, and a voice that made every recipe sound like an adventure.”

Reading this article reminded me of why I started my blog in 2010. I had just moved back from France and I was trying to figure out what to do with my life. Also, I was trying to find my way as a baker and cook. Every recipe was truly an adventure to me back then because I had never made them before. My skills were almost zero, but my passion and drive were 100.

I go through times where writing this blog feels like a useless endeavor, because I wonder, how many people are actually reading it? I also think, is it worth it to set aside time to write when I have so many other things going on that demand my attention? Sometimes, when I’m stressed out or overloaded with work, the last thing I want to do is sit down at my laptop and write a blog post.

However, I’m beginning to realize that it’s the first thing I should do, because in writing this blog, I’m reaffirming my passion for food, cooking, and baking. It allows me to reconnect with myself and reflect on one of my greatest passions. It also reminds me that whether I’m making a recipe for the first time or the thirtieth time, it’s an adventure because I never know what’s going to happen next. The kitchen, like life, holds many surprises; some good, some bad, but ultimately, all teachable moments.

So that is my long-winded way of saying, I’m back, bébé. In honor of my return to blogging, I bring you these chocolate candied orange scones for your breakfast, brunch, or all-day pleasure. What I love about making scones is the process: You have to get kind of down and dirty if you’re really going to do it right. You might have a stand mixer on the counter and be tempted to use it, but I’d urge you to go the other direction and try make these mostly with your hands. It’s messy but so rewarding when you see the dough finally come together, and how the scones look when they’re right out of the oven.

Here’s a song to get you started on your chocolate candied orange scones journey.

Chocolate Candied Orange Scones

Ingredients

4 cups AP flour
5 Tbsp very cold butter, cut into cubes
1 Tbsp baking powder
pinch of salt
1 Tbsp granulated sugar
zest of one orange
75 g candied orange peel, finely chopped
75 g dark chocolate, chopped
1 1/4 cup of whole milk
1 egg, beaten

Directions

Preheat the oven to 425 degrees F. Line a baking sheet with parchment paper. Sift the flour and baking powder together in a large bowl. Add the cold, cubed butter to the flour mixture and use your thumb and pointer finger to pinch it flat into the flour. Once all the pieces are flattened, use your hands to work the butter into the flour until the butter is in pieces the size of peas. Whisk in the salt, sugar, and orange zest. Toss in the chopped orange peel and dark chocolate, then add the milk. Use your hands and/or a wooden spoon or pastry cutter to combine the milk with the flour mixture until it forms a shaggy dough that holds together without any dry, flour-y pieces.

Turn the dough out onto a lightly floured surface and pat it into a round big enough to cut out 12-14 scones. Use a 2-inch biscuit cutter to cut out as many scones as you can (I got about 14). Place the scones on the pre-lined baking sheet and brush the tops with beaten egg. Bake them for about 12-14 minutes, or until they’re golden brown on top. Enjoy!

Posted in Breakfast | 4 Comments

Batsh*t Crazy Blueberry Cobbler

I can’t believe it’s been seven months since the last time I blogged. I feel guilty, but then, I don’t, because a lot has happened; I started a new job, left it, and started another one. I road tripped up the California Coast. I also made this batsh*t crazy blueberry cobbler.

How did you come up with the name? you might ask. It was inspired by the times. I can’t believe I live in a country where someone who owns a gun has more rights over their weapon than I do over my uterus. It’s distressing, horrifying, and disheartening. I honestly feel like crying and puking just writing about it.

I could go on for hours, but I’m basically speechless. I actually think this movie I just watched would be an eye opener for anyone who is trying to understand what it means to take away a woman’s fundamental right to control her own body. It’s a French movie set in the 60s, but the scary part is, it has direct parallels with what is happening today. There were parts where it was hard to watch, but I tried to force myself to watch all of it. If I’m having this reaction and I’m not dealing with this currently, imagine how the hundreds of thousands of women feel who are dealing with this reality every day.

I don’t consider myself a naive person, but the more I think about what I learned in school and what is currently transpiring, the more I feel like a fool. I sat through U.S. Government in high school proud that I lived in a country that gave women the right to choose. Of course, as I got older I realized that many women couldn’t choose, but I never thought the government would revoke this fundamental human right. Honestly, I feel like chattel. We’re all going around, making plans, living our lives, but HELLO. The country’s top authority decided we are less than human beings; we, as women, are basically nothing.

So anyway, as I try to grapple with all the above, I made some Batsh*t Blueberry Cobbler. I’m not one of those people who thinks if you don’t laugh, you cry; I’ve done plenty of crying over the past few weeks. But I do believe in directly responding to the times with the things I create. I’m going to brainstorm more on what that means the next few weeks, months, and perhaps years.

In the meantime, I’ll leave you with the recipe for this cobbler. You can sub in any fruit, but be aware that berries will probably work better here than some other summer fruits like peaches or nectarines. The juicier the fruit, the better your cobbler will be on the bottom. The top is consistently good as long as you don’t overmix the biscuit dough.

Batsh*t Crazy Blueberry Cobbler

Ingredients:
4 1/2 cups fresh blueberries
1/3 cup sugar
1 Tbsp all-purpose flour
1 1/2 cups all-purpose flour
1/2 tsp Kosher salt
1 Tbsp sugar
2 1/4 tsp baking powder
6 Tbsp cold unsalted butter, cut into 1/2-inch pieces
3/4 cup heavy cream
turbinado sugar for sprinkling

Directions:

Preheat the oven to 375 degrees F. Toss the blueberries with 1/3 cup sugar and a tablespoon of AP flour. Let it sit for a while, stirring occasionally.

When you’re ready to assemble the dish, whisk 1 1/2 cups AP flour with the salt, sugar, and baking powder. Toss in the cold pieces of butter and use a pastry cutter, two forks, or your hands to create a mixture that has coarse crumbles. Stir in the heavy cream, mixing until the flour mixture is just moistened. You can add a little more cream if you need to, to make the dough come together.

Pour the blueberry mixture in a small baking dish. Using your hands, form pieces of the dough into small circles that are about 2 inches wide and place them the pieces on top of the berries, leaving a little space in between. I like to do about 3 biscuits per row. Sprinkle the turbinado sugar on top of the biscuits.

Bake for about 35 minutes, or until the biscuits are golden brown and the blueberry mixture is bubbling. Serve warm with more heavy cream or ice cream.

Posted in Uncategorized | 2 Comments

Blood Orange Dark Chocolate Chip Scones

These might be my favorite scones I’ve made recently, and I’ve made *a lot* of scones. They’re citrusy, sweet, chocolate-y, and delicious. Basically, they’re everything you need in a winter scone.

I’m a big fan of blood oranges. However, I only have a certain window when I can find good ones at the grocery store in the Midwest, and that window is usually now. Last week, I picked up a couple in preparation to make these scones.

My favorite thing about blood oranges is the color inside. They live up to their name (although I guess you don’t want to think about the inside of the orange being bloody), as their insides are usually a deep red color. When you cut into them to squeeze the juice out like I did for this recipe, your kitchen counter will probably look like a crime scene.

Before I turn you off blood oranges forever, just know that the mess (and slight trauma) will be worth the finished product. Whisking blood orange juice with powdered sugar makes a delightful pink glaze that you can put on top of any scones. The juice is good natural food coloring, especially for baked goods around Valentine’s Day.

If you’re an avid baker, you might notice a weird ingredient in these scones: An egg. Most scones just rely on milk to hold them together, but I’ve added a beaten egg into the mix. It’s a great binder and prevents the scone from spreading out too much as it bakes in the oven (as often happens, especially if you bake scones without freezing them first). It’s also a great time saver because I think few of us like to wait 15 or 30 minutes for scones to chill before baking them.

Another note: The scones and the icing are kind of improvisational. I’ve included a recipe below, but you might find that you need a little more milk to get the dough to come together, or a little more powdered sugar to get the icing the consistency you want it. Either way, don’t panic: You’re shooting for a scone dough that is just combined, but not dry and flour-y, or overly wet and sticky. With the glaze, if you like thicker glaze, add more sugar like I did. If you like glaze that’s less noticeable, add less sugar or more orange juice.

Here’s a song to get you started on your blood orange dark chocolate chip scone journey.

Blood Orange Dark Chocolate Chip Scones

Ingredients

for the scones:
180 g plain flour
120 g spelt flour
1 Tbsp baking powder
25 g light brown sugar
1/2 tsp Kosher salt
1/2 tsp ground cinnamon
75 g cold butter, cubed
2 blood oranges, zest finely grated
3 oz dark chocolate, chopped into chunks (I used 85% dark chocolate)
1 large egg, lightly beaten
100 ml whole milk, plus more for brushing the tops of the scones

for the glaze:
125 g powdered sugar
2 Tbsp blood orange juice

Directions

Preheat your oven to 350 degrees F. Line a baking sheet with parchment paper or a silicone mat. Set aside.

Whisk together the flours, baking powder, brown sugar, salt, and cinnamon in a large bowl. Add the butter and use a pastry cutter or your fingers to cut it into the dry ingredients until the butter forms pieces the size of small peas. Mix in the orange zest and dark chocolate, Mix in the egg and milk, using a wooden spoon or your hands to get the dough to come together. Turn the ball of dough out onto the counter, pat it into a circle that’s about one inch thick, and then cut it into eight pieces. Place the pieces on the prepared baking sheet and brush the tops with some milk.

Bake the scones for about 12-15 minutes, or until they’re golden brown on top and spring back to the touch. Let them cool a bit before placing them on a wire rack to cool the rest of the way. In the meantime, make the glaze by whisking together the powdered sugar and blood orange juice in a shallow bowl. When the scones are done cooling slightly, invert them and dip the tops into glaze and place them back on the wire rack to set. Enjoy!

Posted in Breakfast, Brunch | Tagged , , , , , , , , , , , , , , , , , | Leave a comment